TamaWrap® – from storage to module step by step
Handling, storage and shelf life
Learn exactly how to best handle and store TamaWrap®.
Handling Recommendations:
- Handle one pallet at a time.
- Use suitable forklift to handle the pallets:
- Recommended lift capacity - 4,400 lbs (2 tons) forklift.
- Use long forks when handling pallets from their narrow end to minimize damage.
- USE PALLET PULLER when unloading from truck.
- Pallet pullers available from material handling supply houses.
Caution!
- Wrap can be damaged by improper handling.
- Make sure that all sharp edges and protrusions on hauling equipment are eliminated.
Storage Instructions:
Keep products in their original package until use.
Store under roof in an enclosed structure.
Avoid exposure to extreme heat, direct sunlight or moisture during storage.
Stacking of up to two pallets high is permissible with proper handling equipment.
Shelf Life:
- Up to 24 months from first delivery to dealer.
- To be used within two seasons. It is recommended that you use your old wrap first (FIFO) First In—First Out.
To ease differentiation between production seasons, color of pallet label and roll label changes each season.
2014 season color: Mustard Yellow.
2014 season color: Mustard Yellow.
Installation
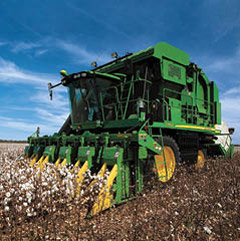
Five rolls of 24 individual TamaWrap® are each manually loaded by two people onto the John Deere On Board Module cotton harvester.
To ensure correct installation on of the TamaWrap® on the JD On Board Module cotton harvester, every core is marked on its left hand side with black dots or blue stripe on the core and a label inside the core.
TamaWrap® Roll Loading
Cotton harvesting process
All about John Deere
On Board Module cotton harvester
On Board Module cotton harvester
The wrapping process
1The wrap is fed into the John Deere On Board Module cotton harvester.
2The wrap portion is fed around the module by the feeding mechanism.
3The Z-LOCK™ is activated to seperate the wrap from the roll and to secure the tail of the wrap.
4The round module is ejected from the John Deere On Board Module cotton harvester to the handler while the harvesting continues.
5The round module is placed at the end of the row.
Cotton module staging instructions
Proper module staging impacts the ability and reliability of module truck pickup and subsequent ginning. This section demonstrates the proper procedure for staging cotton modules for pickup by properly equipped module trucks or moon buggies. Failure to follow these instructions can adversely affect the integrity of the modules.
Choosing the proper staging site:
Modules should be staged on a high flat surface.
Staging on well-defined flat driveways or a flat disked surface is optimal.
Staging on well-defined flat driveways or a flat disked surface is optimal.
When choosing a staging location, ask yourself “Can a module truck retrieve from this location after a significant amount of rain?”
If a module truck tires and/or tracks have to slip to gather the load, damage may occur to the underside of the module due to relative chain slip.
If at all possible do not stage modules on top of rows or beds or internal portion of field where module truck access will be difficult. Modules will take the shape of the surface they are placed on. Setting on beds or uneven surfaces requires digging into the ground with the module truck chain to safely get under the entire surface of the module.
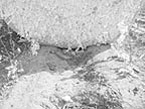
Incorrect Staging Surface
General module handling information:
Modules should only be squeezed with a low pan position when resting on the ground.
Attempting to resqueeze when module is partially raised can cause excessive stress on wrap.
Attempting to resqueeze when module is partially raised can cause excessive stress on wrap.
Transport speed of the tractor with a module on the handler shall not exceed 10 mph (16 km/h).
Gap between the underside of the module and the ground should never be less than 6 in.(15 cm) during module staging to prevent drag tearing of underside of wrap.
When transporting modules through harvested rows, the module should be carried high enough to minimize contact with those rows.
Fully raising the three point hitch is recommended when transporting with nonmasted handlers.
A masted style handler is recommended for transporting modules down harvested rows.
When loading or unloading flatbed trailers, drive straight away from the trailer (perpendicular to bed axis) to prevent handler contact with adjacent modules.
Significant wrap tears must be repaired in the field before module truck pickup to prevent further wrap damage and ginning problems.
Recommended repair tapes: Catech 277 and Berry 5400.
Recommended repair tapes: Catech 277 and Berry 5400.
Loose outer tails must be secured with 3M 90 spray adhesive or lint bale repair tape before being retrieved by module trucks or moon buggys to prevent subsequent module damage and cotton ginning difficulties.
Module staging instructions:
Module alignment
Centerline of individual modules must fall in a +/5 in. (13 cm) bandwidth of the composite centerline of all modules. Do not simply align one side of all modules.
Improper alignment increases the chance of wrap tear due to the truck driver having to stop and start loading procedure and from the modules rubbing the trailer walls.
Utilize GPS capability when available for straight line scribing and subsequent staging of modules over the line.
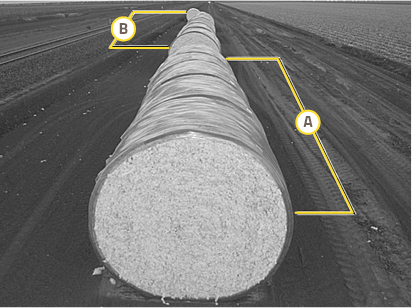
AProper Center Alignment
BImproper Center Alignment
Proper gaps between modules
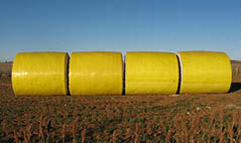
Modules must be staged for module truck pickup with gaps between 4 in. (102 mm) and 8 in. (203 mm) at module cores.
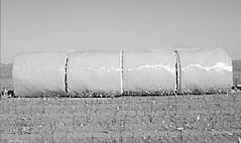
Too little gap can cause tearing as modules travel up module truck incline due to interference with adjacent modules.
Having module ends contacting each other during long term storage can increase chances of mold growth. Gaps between modules allows ventilation.
Having module ends contacting each other during long term storage can increase chances of mold growth. Gaps between modules allows ventilation.
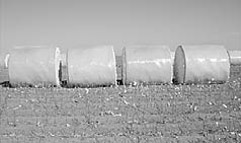
Excessive gap can cause four modules to be too long for available truck bed lengths.
Tip
An easy way to achieve the correct gap is to bump against a previously staged module and then determine the number of tractor tire lugs that must pass forward from a line of sight to achieve the proper gap as the tractor moves forward.
